What is baby led weaning (BLW)? (From Mamanatural)
First coined by Gill Rapley and Tracey Murkett in their book Baby-Led Weaning: The Essential Guide to Introducing Solid Foods, Baby-led weaning is an approach to introducing solid food where baby is allowed and encouraged to self-feed solid finger foods instead of receiving purées via spoon. For those of us in the US, baby led feeding may be a better term as BLW is not about weaning babies off breastmilk or formula, but is weaning them onto solids. (Although, anytime we introduce food, we are in a sense starting the weaning process, as baby will naturally start to decline her breast milk consumption. But with BLW, the baby is in charge.) BLW babies:
- Are encouraged to join the family at mealtime and self-feed appropriate finger foods.
- Choose what, how much, and how quickly to eat.
- Are given the freedom to explore new tastes and textures without the pressure to eat a set amount or a specific food.
- Continue to nurse (or receive a bottle) just as often. Solids are to compliment milk, and baby is trusted to know when to increase solid feedings and decrease milk (usually later in the first year).
When is baby ready?
Experts agree that solids should be delayed until the middle of the first year of life. This is when baby’s digestive system is mature. Some babies may seem ready at 5 ½ months, while others may not be ready until 8 months of age. It’s important to take into account ALL readiness signs for each individual child. As always, consult your child’s pediatrician if you are unsure or have questions. Signs of readiness include:
- Baby can sit up well without support.
- Baby has lost the tongue-thrust reflex (automatically pushing solids out of mouth with tongue).
- Baby has developed the fine motor skills to self feed. Development of a pincer grasp (baby picks up food between thumb and forefinger, not palm and fingers) typically happens at around 6 months, but sometimes as late at 1 year.
- Baby is willing to chew, even if he has few or no teeth.
- Baby shows interest in participating at mealtime, and may try to grab food from your plate and put it in his mouth.
What are the benefits of baby led feeding?
It’s easier
- Purées are time consuming. It’s much easier to adjust what the adults are eating to suit baby instead of having to get out the blender or potato masher.
- BLW babies aren’t pressured into eating. They are trusted to know when, what, and how much they need to eat. Therefore, there is less stress and everyone can enjoy mealtime. (No more airplane spoons
 )
)
- Babies feed themselves, so you can eat at the same time! Baby led weaning gives moms the chance to relax and eat themselves.
Baby develops good eating habits
- Baby (continues to) learn self regulation, which may set the child up for a healthier BMI in the future according to this study.
- Self selection of food has even been shown to increase weight in underweight babies, therefore supporting a healthy weight in most babies.
- Since BLW babies experience a wide range of healthy foods early on, they may be more likely to continue to enjoy those foods later in life.
It’s educational
- Babies learn to safely handle food (they learn to chew THEN swallow)
- Babies learn to manage different textures, tastes, sizes, and shapes of food.
- Babies get lots of hand eye and fine motor practice by learning to grasp food and move it to their mouth.
- Babies learn best by observing and copying. Eating meals together (and eating similar foods) gives her many opportunities to learn about food.
How to get started with baby led weaning?
The great thing about baby led weaning is that you really don’t need much to get started. The first thing you need is a safe place for baby to sit. A highchair is a great choice, but a parents lap is just as good (remember, baby should be able to sit up unassisted at this point). The next thing you need is healthy, appropriate finger foods (covered below). A BLW baby is offered a variety of healthy whole finger foods (as well as a small amount of water) to choose from and explore. Follow your baby’s cues. Begin offering solids once a day, and gradually increase as the child shows he wants or needs more. Baby-led weaning families are encouraged to make family mealtime a habit. One reason is that baby learns best by observation and imitation. When everyone eats together and eats the same food, baby feels included, and mealtime is a fun experience rather than a battle. If eating meals together doesn’t work for your family, consider eating a snack while baby has his meal.
What foods can I feed my baby?
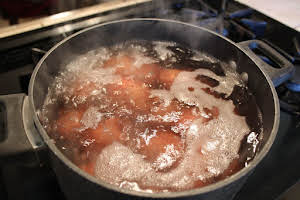
Baby’s first foods should be a selection of fresh fruits, soft cooked vegetables, healthy carbohydrates, and fats. Think soft and easy to gum and swallow. When given a variety to choose from, baby will naturally choose the foods that meet her nutritional needs.

Baby Led Weaning First Foods
Some great first finger foods for baby are:
- Avocados
- Banana
- Sweet potatoes
- Soft cooked apples
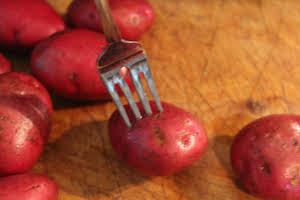
- Soft cooked carrots, green beans, zucchini, and beets
- Very ripe peaches and pears, plums, and melon
- Pumpkin
- Green beans with the skins removed
- Egg yolk
- Meat or poultry
- Liver
- Slices of sprouted bread, cooked pasta, brown rice (Some decide to wait until molars come through before introducing grains. Wheat is recommended to be avoided until later in the first year.)
Baby Led Weaning foods to avoid:
Some of these are common sense (popcorn for baby?!) but some good reminders when practicing baby led weaning.
- High choking risk foods like: grapes, cherry/grape tomatoes, nuts, whole hot dogs. (You can find a full list here.)
- Allergic foods like: gluten, egg whites, nuts (peanuts), seafood, and citrus, especially if you have family history of sensitivity
- Added table salt* or sugar
- Unhealthy and processed foods like: chips, popcorn, sugar-containing foods, breakfast cereals, gum, and hard candy.
- Honey
- Stimulants: like chocolate or sugar
* Small amounts of high mineral sea salt can be added with the approval of physician
Baby Led Weaning Safety
There are obvious safety concerns with introducing solids to your baby. Assuming that baby has shown signs of readiness and can sit up unassisted, it’s then important for parents to be vigilant and never leave baby alone when eating. It’s equally important that only baby put food into her own mouth.
Won’t my baby choke?
Choking is a real concern with any supplemental feeding, which is why close supervision is necessary. That said, there needs to be a distinction between gagging – which is a safety mechanism that safeguards against choking by bringing large pieces of food forward to be chewed – and real choking. As baby grows, the place in her mouth that triggers the gag reflex moves further back towards the throat. According to Rapley, this is one reason why baby led weaning is valuable, because baby learns to chew and swallow when this reflex is still very close to the front of the mouth. Of course, for all parents, understanding the signs of choking and knowing how to respond is very important. Here is online education… but better yet, contact your local hospital or community center to find classes.
Will my baby get enough to eat?
Breastmilk (or formula) will make up the majority of baby’s nutrition from 6-12 months of age. The main purpose of solids in the first year is to introduce baby to new tastes and textures while teaching her to chew and swallow food. If baby is gaining normally and thriving, then she is getting enough to eat. Baby-led solid feeding trusts that baby knows when she is hungry, when she is full, and what she needs to meet her nutritional needs. If she is struggling with low weight, you can certainly add in some smoothies, purées, or extra fats like avocado and butter. That’s the beauty of baby led weaning. It doesn’t have to be all or nothing. Work with your physician to determine what is best.
Will my baby get enough iron without iron-fortified baby cereal?
Yes, if she is breastfed. The iron in breastmilk is absorbed at a percentage of 50-70% while the iron in iron-fortified cereal is absorbed at a rate of 4-10%. According to Kellymom.com, “Healthy, full-term infants who are breastfed exclusively for periods of 6-9 months have been shown to maintain normal hemoglobin values and normal iron stores.”Breast milk is actually a perfectly sufficient source of iron.”
I would add letting your child’s umbilical cord pulse and wait to clamp for at least 3 minutes after birth helps tremendously since the baby gets 1/3 of his blood supply back! It also probably helps if a breastfeeding mama consumes her placenta and eats red meat a few times a week to replenish her stores.
Formula fed babies may also get enough iron from iron rich finger foods such as:
- Meat & poultry (especially beef and liver)
- Winter squash
- Sweet potatoes
- Sea vegetables
- Greens
- Beans
- Egg yolks
If there is a concern about baby’s iron level, have it tested before supplementing.
Tips for BLW (baby-led weaning)
SaveMama NaturalBaby-led weaning allows and encourages baby to self-feed solid finger foods instead of receiving purées via spoon. Here’s how and why to practice it.39115Mama NaturalMama Natural  Blog Posts
- Hunger can create an unhappy experience for everyone. Be sure to nurse or bottle feed baby up to an hour before offering solids so that his tummy isn’t empty.
- Forget about expectations and let it be a learning experience. Baby probably won’t eat much at first, and that’s ok!
- Realize that it may be a slow process. Babies can take a longer time when they’re in charge. As they get the hang of it, feeding time will be quicker.
- It will be messy. Many parents find a naked baby is easiest to clean up afterwards.
- Don’t serve small pieces of food but instead serve pieces of food large enough for baby to grasp easily. Some families find cutting food with a crinkle cutter or rolling pieces of food in oat flour can make pieces easier for baby to hold.
- If food can be smashed between your finger and thumb, it’s probably appropriate for baby.
- Don’t put more than a few pieces of food on the highchair tray or table at once, so baby won’t get overwhelmed (or have as much to throw!)
Progress Not Perfection
Keep in mind that you can always do a hybrid approach to feeding. Super soft foods like avocado and sweet potato might be better served with a spoon. Let your child play and try to feed herself using the utensil. You’d be surprised just how well she can imitate you! Some moms let baby gnaw on soft pear slices, but prefer to spoon feed foods like puréed meat or bone broth. I know some parents who make smoothies, which a baby can drink through a straw if the family is on the go. Just know that you can experiment with feeding approaches that work best for your family and lifestyle. (Although it’s best to probably stick with a few set routines so your baby doesn’t get confused.)


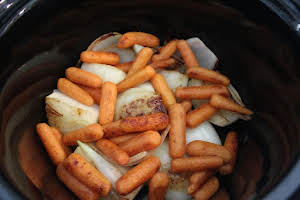
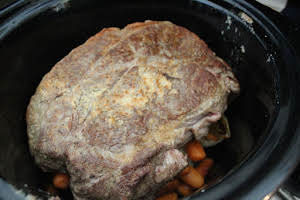
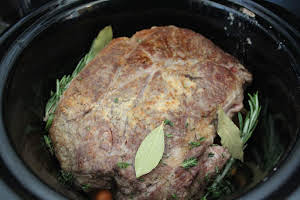
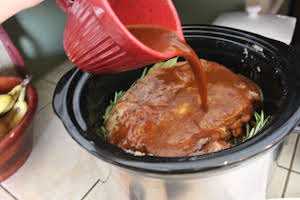
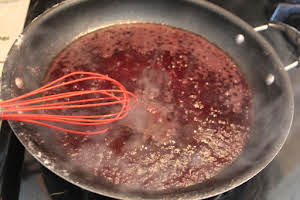
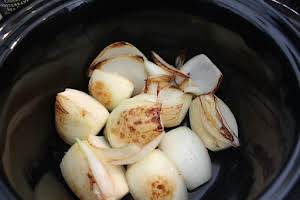 2. Pour some olive oil into a pan. Heat on med-high until almost smoking. Put onion quarters in and brown on all sides (achieve a nice deep golden color). When browned, remove and put in bottom of Crock Pot.